Showing posts with label Spellbinder. Show all posts

Tuesday, October 5, 2010

HYDRANGEAS MADE WITH HEART


Gingersnap Creations has so many wonderful challenges, and I wish there was time to do all of them, but am not staying focused very well lately, have a ton of projects started and keep finding more to start, thus there are alot to complete. Made a list yesterday and hopefully this will help.


GC#70 challenge is to use punches, this is my finished card. The hydrangeas where made by using a piece of white cardstock 1" wide, then folded in half, you then punch out a heart to make the flowers. I then used a sponge and yellow ink to do the center of the flower, and pink ink to sponge the outside of the flower. It takes 2 hearts for each flower, the leaves are also a heart punch, a halft pearl was added to the center to complete the flower. The base of the card is pink card stock, then an embossing folder was used for the white mat. The oval and rectangle are from Spellbinders. The watercan is a stamp from a set that I purchased at Michaels.


This was such a simple technique that I was able to teach my niece how to do it, and also owed my Aunt. My Aunt is just getting into papercrafting and this was something that she would see the result immediately. She does wonderful dried flowers and gave me some that I will be using on my cards.


Am trying to get a few things together for a Boutique with my Aunt around the first of November, really have my work cut out, but am looking forward to giving it a try, will be able to spend some quality time with her, so it will be worth the time.


Thanks for stopping by, would love to hear your comments. Have a wonderful day.


Friday, May 28, 2010

Golden Butterflies


Haven't been around for awhile, have been working on an altered book, and also a baby shower. Will post the invitation, diaper cake and favors that I made for the shower tomorrow, but wanted to post this card for a couple of challenges. You know me I really enjoy doing challenges, but just haven't found the time.
It was my goal yesterday to make a new card, here it is. The sketch is from Our Creative Corner, thought this was a great sketch and they do give me a direction for the card. The picture isn't great, but the tiny butterfly on the left hand corner is dimensional. The paper is from the Mariposa Mat Stack by DCWV which was purchased at Joanns.
Gingersnap Creations just issued a new color challenge, to use burgundy, ivory and black. The center oval was created with my classic scallop die cut from Spellbinders, and then the inside oval, with my cutting system from Creative Memories. The gold butterfly is embossed to tie into the wonderful background paper. I also used VersaMark to stamp small butterflies on the background, unfortunately they don't show in the photo.
Crafty Creations challenge this week is to use your favorite stamp, well that is next to impossible, so a used one of my favorite stamp sets from K & Company. It is a set of clear stamps and has a great assortment of stamps, I should just leave it out all the time, it is used for a wide variety of cards.
Getting ready for work, will share some baby shower stuff tomorrow. Thanks for stopping by, have a great day and weekend.

Wednesday, April 21, 2010

A GUARDIAN ANGEL

Have been pretty busy on my days off, not only have I been working on a quilt, but took the time to complete a couple of cards. This card is for the challenge at Our Creative Corner, they have a different sketch each Thursday.


The card base if 5 x5, with 1 1/4" squares, the paper is from the "Once Upon a Time collection." Used the corner rounder on the center mat, and used my label die cut, from Spellbinders, to make the frame around the angel. The hardest part was the embellishment, didn't want to use ribbon, put after trying twine, beads, wire, and anything else I could find, the double faced picot ribbon was what ended up on the card.


A glue pen was brought out for the wings, and then glitter added to give some dimension. Also added a pink rhinestone to the center of the bow. Used colored pencils to color the angel. Will be sending this card to my sister, she just had knee surgery on Monday, she loves angels and fairies, know this will put a smile on her face.

The other card completed will be posted tomorrow, it is using the faux silk technique, this was really a fun technique and will be doing more with this technique.

Hope everyone is having a great day, time to work on some more projects. Talk with you soon.

Wednesday, April 14, 2010

ROSES FROM THE HEART

Got home from my trip to Reno, and everything was crazy at home. Didn't know it but Billy, my SO, had gone into the hospital on Monday night, I left that morning. He didn't tell me while I was gone, knew that I would turn right around and come home. Sunday night before leaving I had our new puppy delivered while at work, so that I could surprise Billy. When getting home I walked in and said "we're home" he knew something was up. Billy was excited about the puppy and immediately started spoiling him. Billy wasn't feeling well and went to the emergency room, and they wouldn't let him come home. His potassium level was extremely high, which can cause kidney damage.

When I returned home on Wednesday night upon calling Billy to tell him I'd be home shortly, he then told me he was in the hospital. Got home and took care of the dogs, and started my week at work and going to the hospital, trying to cope with a new puppy, which is like having a baby. Made it through my week by the skin of my teeth. Billy came home on Monday, and I was able to take sit down and relax a little.

Checked out some blogs and started a quilt yesterday, for my grandson, got the fabric while in Reno. Also wanted to check out some cards and it suddenly dawned on me that I had completed a project before leaving for Reno for the color challenge at Gingersnap Creations, which was to use the copper, ginger and rust.

Made roses that are made out of paper and then coated with UTEE, learned this technique from Hels at Ink on Your Fingers, check it out here. Hels has a wonderful tutorial for the flowers, and I can't get enough of them, they are so fun to make and there are so many different ways that you can use them. I had this picture of my mother and father on the wall, and thought that it would be great to add these dimensional roses to the frame, love the result.

The paper was from my stash, used my flower die cut from Spellbinders and add copper brads for the center of the flowers. These flowers remind me of wood flowers, that were popular back in the late 50's early 60's, am now telling my age, know that my mother would love these and want to make tons of them. It is because of her that my sister and I have such a love of crafts, she was our inspiration.


This photo shows more detail and you can see more of the colors for the challenge.

Thanks for stopping by today, hope everyone is having a great week. Am going to be working on my crazy quilt and will try to get at least one new card made before going back to work tomorrow. Found some inexpensive clear stamps in Reno, and a few other little items that I can't wait to use.

Have a crafty day.


Monday, February 22, 2010

RECYCLING YOUR OLD JEANS

While surfing the web found a new techique for using my Big Shot, knew that you could cut fabric with it but had not tried it, but take a look at the results.

Last year I had up my old jeans to make a quilt and had cut 9 x 9 squares and couldn't part with other scraps so they were cut into 4 x 4 squares. Have seem alot of rag totes, and the light finally came onto make a tote using the smaller squares. Can't believe I actually had all the supplies to put this bag together, didn't have to go shopping.

The flowers were made using the flower die cut from Spellbinders. The die cut has three sizes, used all three. Each flower is three layers, fabric, batting and fabric once again. This was so easy as all three layers were cut at one time. I did use a glue stick to put the fabric together before putting through the Big Shot, it made it easier to do the stitching around the edges of the flower so they didn't slip. Built up the flower using all three sizes. The center of the flower is double face satin ribbon with a double knot.


The finishing touch was the leaves which are loops of ribbon. Hopefully your can see the detail of the centers and leaves with this photo. Also here is a video of how the flowers were made, they show sizzix diecuts, but you can also use Spellbinders.


Thanks for stopping by today, hope that this will be helpful if you want to make the flowers. Have a crafty day.

Thursday, February 18, 2010

PRETTY IN PURPLE

It is my granddaughter, Katie's, birthday this month, 18 is the magic number this year. She is such a sweet girl and enjoys school, she plays the harp, is in the Debate Club, and wants to be an actress. Her favorite color is purple, so everything she gets is that color. Last year she received a paper purse and a purple shoe, for her birthday.

I had made this card in pink and wanted to make sure that this year Katie got one that is purple. The base of the dress is cardstock and then I have added strips of purple sheer ribbon to create the designer dress. I also added picot bows at the top and across the bottom. The corners were also rounded with a corner rounder and Spellbinder scalloped oval die cut for the sentiment on the front.


Ribbon happens to be the challenge at The Pink Elephant, there are some wonderful project featuring ribbon on the blog, and this is my finished project. Know that Katie will really love this card and wish I could see her face when she opens it, she is such a "drama queen."
The above picture was taken at Christmas, this was the reaction she had about all of her gifts.
Happy Birthday, Katie!

Thanks for stopping by today and have a crafty day.

Sunday, February 14, 2010

Romance is in the Air

Once the Valentine cards were completed for my daughter's class, it was time to move on to a card for my Sweetheart. I had some ideas in the back of my mine, just finished the card a few minutes ago. Billy won't get it until tomorrow, as both of us work tonight, we will have our little romantic evening tomorrow with a candlelight dinner.

Last year I gave Billy a card and homemade brownies for Valentine's day, he was more impressed with the Valentine card, hope that he likes this one as much.

It just so happens that this card will be representing a few challenges also. Gingersnap Creations wanted a card to be romantic, that brings to mind, music, roses, hearts and of course hugs and kisses. The background paper was from Graphics Fairy, the roses were embossed, or should I say de-embossed using my Big Shot and the Textured Impressions Manhatton Flower. A brayer was used to color the flowers with Classic Red Ink from Stampin Up.

The love sentiment is from a wedding set, that was purchased at Joann's on clearance, got to love that. The ovals are from the scalloped oval die cuts from Spellbinders. The heart punch from Creative Memories was used to make the three matted hearts. Heart studs were added to the center of each of those hearts. This made for a "Mushy Gushy Valentine" which is the challenge for Pink Elephant, and "Have A Heart or Hearts" is the challenge at Daring Cardmakers.

Time for me to head off to work, hope everyone has a wonderful Valentine's Day and you get hugs and kisses from your loved ones.

Thursday, February 11, 2010

LOVE LETTERS

These little mailboxes have been around for years, but I have never decorated one. It was a little harder than I thought it would be. Found this mailbox at Michaels, it was a Christmas mailbox, but changed it to hold love letters for Valentine's Day, this was a challenge at Scrappy Frog.

Used X's and O's paper from my stash, added ribbon around the middle. It was necessary to take off the arm, used brads to put it back on. The background for the letters was embossed using a Big Shot. The folder is from Provo Craft. Also used ribbon around the edge of the lid, also covered the front with a different heart paper.

The sentiment on the arm was stamped with red ink, and then colored in with colored pencils, the scalloped circles were made with Spellbinder die cuts. The flower on the corner of the sentiment is sheer ribbon, that are loops that are glued together and then added a heart stud in the center.


Maybe if I leave this out in the family room, Billy, will leave me a love note, for Valentine's Day, that would be a wonderful surprise.

Thanks for stopping by today, have a crafty one.

Wednesday, January 27, 2010

MORE AND MORE CIRCLES

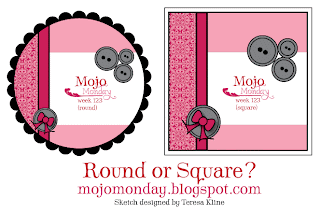
Just love to do circle cards, even though, they are few and far between. This one was just crying to be done. I had made a similar card last year that was for a gift card, but this one it a folded card, that looks like a flower. Mojo Monday is where the inspiration came from, and then I looked to The Pink Elephant, and Crazy 4 Challenges to put everything together.


The Pink Elephant challenge was Polka Dots, Bow, and Pink. Crazy 4 Challenges was Pretty in Pink.
The sketch at Mojo Monday could be done either as a circle or square.


For the center circle my scalloped circles from Spellbinder was used, then using a 1" circle punch the other two layers were added. Brown polka dot grosgrain ribbon for texture and hearts that were found at Michaels. The stamped sentiment was from a discontinued wedding set that I found at Joann's over 6 months ago, never know when you will be able to use some of those stamps, but just need to look at them from different points of view.

The first card I did was red, and then it dawned on me that the challenge was to use pink, oh well, it just made the pink one easier to complete. The paper was from Lasting Impressions, my sister found it at a huge discount. Love all those bargains!!

Have a list of cards and projects that I want to finish in the next couple of days, so am off to complete some Valentines. Please leave a comment, it is great to hear from all my blogging friends.

Have a crafty day.

Friday, January 22, 2010

RESOLUTIONS????

Okay, finally completed my project for the Resolutions challenge at Gingersnap Creations. With the new year comes resolutions, in the past I really haven't attempted or even stated that I would take on any kind of resolutions, but this years was a little different. Am getting older and felt that I was becoming unhealthy, and added a few pounds.

Know that losing weight is probably the #1 resolution out there, but this was just one of mine. We want to make some major changes in our lives this year and they will take quite a bit of time, but trying to lose weight was the one that I could focus on "now."

Have started to juice and exercise a little, watching what I eat and when. Have lost 9 lbs, so far. One of the ideas that was mentioned to keep on track was to write down what you eat each day, thus here is my Food Journal.


Have a stack of composition notebooks that I bought last September and altered it to my taste. Stamped strawberries on the polkadot paper. Used Martha Stewart's lace border punch for the accent. The Food Journal letter is computer generated, and last but not least this is the new die cuts from Spellbinders, that my daughter, Kaylene, gave me for Christmas.

As they say, your have to make healthier choice, seeing things in writing has really helped me to see how to improve my health.

Have a great crafty day.


Sunday, December 6, 2009

Shop Til You Drop

Haven't had time to do much the last few days, my hours at work have changed so I am trying to adjust, and not doing a very good job. Have been working longer hours as the Rodeo is in town and we are extremely busy, don't get me wrong am not complaining on the other hand am extremely happy that we are busy.


I got an email yesterday and I won a challenge at Scrappy Frogs Challenges for my Thanksgiving Dinner layout, was in total shock. Super excited and now I can add another button to my blog. The challenge for this week is to show shopping. Knew that I had download clipart from Fairy Backgrounds that was perfect for the challenge and I have a plaque on my wall that reads "Born to shop not to mop."


All I need now was a sketch, off to Mojo Monday for Week #115 for the inspiration.

This is just what the doctor ordered, quick and easy. Here is the card that developed.


Love vintage clipart and am really enjoying working with all of these fun images. Oh, for the good old days! These wonderful images and be found at Graphics Fairy, check it out. am sure that you will find some inspiration.


Time for me to head off to work. Have more cards and a couple of beaded ornaments to share with you on my days off.


Please leave comments, they always brighten by day. Have a wonderful Sunday.

Saturday, September 12, 2009

Oh My! Pink and Purple

A special card and gift for one of the ladies at work. She loves the color purple, her car is even purple. On one of my trips to Utah, I found some wonderful beads at Hobby Lobby and ask my daughter (Kaylene) to make Gigi a beaded watch. This is the result, love it, know that she will also love it, not just because it is purple. The band can be changed to match your outfit, and she will be getting a different band for Christmas. These are such unique watches and can be personalized for anyone.

Thanks Kaylene for making such a perfect gift, know that Gigi is going to flip.

Of course it was necessary for me to make a birthday card, had a pink envelope and that is where the inspiration came from for this card. Used some patterned paper from Lasting Impressions and then the classic scalloped circles and ovals from Spellbinder. Would have never thought to put circles and ovals on the same card, I was always taught not to mix strips and plaids when growing up, so that is just the way my mind thinks. Years ago we would have never thought to mix patterns, in our clothing, but it is so excepted now that it is the norm, now I am telling my age.


The inside had to be a little funny, hence the quote from Lucille Ball---
The secret of staying young
is to live honestly, eat
slowly, and lie
about your age.
Used the classic oval once again to carry through the shapes on the front, and added the finishing touch of a flower in the corner. This was such a fun card to make and a one of a kind. I've been making 10 of all the cards I've been making lately, but wanted this one to be unique.
The only stamp used on this card was the Happy Birthday. Am so excited about giving Gigi her gift and card, can't wait to get to work. (I must be crazy!!)

Have a great weekend and crafty day.


Saturday, August 8, 2009

What Can I Say?

Happy Saturday! Hope everyone is having a great day, talked with my daughter, Kaylene, they were going fishing. Not going to tell Billy, he will be jealous. We will be going to work later today instead.

Was going to post this card yesterday, but had computer problems, I get so irritated when that happens, am not the sharpest knife in the drawer when it comes to this fancy typewriter. Luckily was able to get in touch with my son-in-law, Tim, the computer whiz and he got things going once again, thank goodness, don't know what I would do, this is my therapy. Enough about all that here is my card for today.

My first attempt at a tri-shutter card, have seen them on every one's blogs and was in aah! Just had to sit down and really focus on what paper to use and stamps. The video tutorial I used was over at Dawn's Stamping Thoughts, there is also a tutorial with step by step instructions and video at SCS in the resource section. The card looks complicated, but was really easy, everyone needs to give this one a try.

There are so many things that you can do with this card, and anyone who receives it will be amazed. I was so pleased with my finished project that I couldn't wait to show it to Billy, his comment was "WOW", that was the reaction I was hoping for.


The small butterflies and scroll stamps are from K and Company, the large one is so old I don't know, sorry. The large scroll is from Inkadinkado. The oval is a classic scalloped oval from Spellbinder. Unfortunately my selection of sentiment stamps are very limited, so once again I turn to my computer.

The base of the card is card stock, and then I used pattern papers from Lasting Impressions, the packet has 3 sheets of 5 different patterns, it worked perfect for this project, as I have a real problem with patterned papers, it seems they never come together quite right. With one packet of paper I was able to make 9 cards, love it!

The butterflies were colored in with pencils, this was such a fun project, it is on my list to do again.

Time for me to get my mind around going to work.

Have a great crafting day.

Wednesday, August 5, 2009

Sister's Day

Over at Gingersnap Creations, there is a list of Reasons to Stamp, the #2 reason is Sister's Day. One of my goals was to use scrap paper, but hopefully have enough paper to complete 9 cards. Everything just seemed to come together, I love vintage type paper had plenty in my stash, it was a no brainer. That is where the inspiration came for this card, also knew that everyone in my family would relate to the picture and verse.


After searching The Vintage Moth blog, I found the perfect photo. My mother came from a large family with 5 sisters, the majority of their photos were of the three oldest girls, hence the reason behind the vintage photo of "Three Sisters". Now it was necessary to find the perfect verse, knew that I hadn't seen a stamp, so the quest was on. Found all kinds of great sayings, but the one that hit home was as follows:


I know some sisters who only

see each other on Mother's Day

and some who will never speak

again. But most are like my

sister and me.......


linked by volatile love, best friends

who make other best friends ever so

slightly less best.


----Patricia Volk


The photo is matted with classic scalloped oval from Spellbinders. Distressed the edges of the sentiment card on the front and inside. (Could not get a picture of the inside, have to use your imagination,sorry!)

Didn't use any stamps, but love the results.

Stop by Gingersnap Creations for more reasons to stamp, we are also looking for new members, love this group of ladies.

Have a crafty day.

Sunday, July 5, 2009

Sunflowers That Brighten the Day

Good morning! Hope everyone had a wonderful 4Th of July. Being in the transportation industry I had to work yesterday, so my 4Th of July celebration will start on Monday. We are going to Salt Lake for a couple of days, Billy has to have some tests run.


Just a quick post and pictures of a couple of projects that I completed last week. We went to dinner at Gayle's (Billy's sister) and I wanted to take the ladies a little gift, hence the jar candle and note cards. This was such a fun and easy project, but the ladies loved them, even guessed right on the fragrances for the candles.
The flowers were made by making using 4 of the Scalloped Circles from Spellbinder, layering and the center is a 3/4 circle. The lace border punch was used for the band around the jar. The stamp used for the sentiment is from K & Company.


The note cards were inspired by Dannie's Designs, she has a video on the instructions, it is easy to follow click here to see all of her wonderful ideas, am sure you will be inspired. The candle decorations were inspired by Treasure Oiler Designz you can see her work here. The stamped flower is from the same set of stamps from K & Company. Used 1/4 ribbon for the ties to complete the holder. Thanks to these two creative women for sharing there ideas, hope these two projects brighten you day.

Have a great day of crafting!

Friday, June 5, 2009

Oceans 11


Paper Craft Planet has a weekly challenge called Cinema Saturday, when I read that this weeks movie was Ocean 11, just couldn't resist taking part and joining the group.


1960 was when the first Oceans 11 came out, having lived in Las Vegas most of my life, this brought back old memories. Believe it or not, in 1970 I worked at the orginial Sands Hotel, which is where the Rat Pack performed in the Copa Room. The Sands Hotel has been replaced with the Venetian Hotel. The Bellagio Hotel where the remake was filmed used to be the Dunes Hotel, things in Las Vegas change everyday, most of the old hotels are long gone, for being such a young city, it does have alot of history, problem is almost all the orginial hotels have been replaced by mega resorts.


The Rat Pack was the talk of the town, this is why I choose to stay with a black and white theme on my card, in honor of the classic movie. I used scraps of paper to make the background and then added "brads" in the corners. Everyone thinks about coming to Las Vegas to retire, hence the quote on the front of the card, with a little footnote inside that reads "the goal is to enjoy it to the fullest, but not so fully that you run out of money." --Jonathan Clements

Have a great day and go see a good old movie.


Thursday, May 14, 2009

Want A Be Sunflower Card


The inspiration for this card came from Inspired Designs, love the colors and of course the sunflowers.


When starting the card I knew what directions it was headed, but it took on a life of its own, liked the results using the scalloped circles from Spellbinders thought it would make a great picture. The orginial card was 5"x 5" , checked out the local Dollar Store and found an 8"x 8" frame. Will be making another one the same size and then use the larger scalloped cirles and make a bigger version, then will have a three picture grouping. When completed will take photos so you can see the finished product. This will have to wait a few days, as this is my Monday for work.


Kept looking at the picture, and found it necessary to go ahead and make another card. Scored the base of the card to give a lattice look and pierced the paper where the lines intersected. Love all the dimenions. Very simple sentiment finishes off the card using oval shapes.


Have fun with this card, let your imagination run wild.


Saturday, May 9, 2009

Happy Mother's Day


A very special wish to everyone out there, have a wonderful Mother's Day. Unfortunately I will be at work, thought it would be nice to give the ladies that work with me something special. Went to Home Depot, bought some plants, made a special pot out of DP, added a pick with "Happy Mother's Day." Mostly work with men that are limo drivers and shuttle bus drivers so this was a perfect opportunity to treat the ladies, know that it will put a smile on their faces. I saw the pattern for the little pots, or boxes along time ago and don't remember whose website had the tutorial, sorry. This is an easy project here are the steps:

l. Cut 2 strips of DP 3" x 11"

2. Score at 1" , 4" , 7" and 10"


3. Fold all score lines.


4. Lay one strip on top of the other so you have an X, use tape to adhere.


5. Use decorative border punch for flaps. The border can also be punched before putting them together.

6. Punch a small hole on each corner, use ribbon or raffia to tie corners and you have a pot for a 3" plant.


7. Spellbinders classic scallop oval #3 and classic oval #2 were used for the sentiment, there was computer generated.

8. Used floral wire for picks.


The hardest part of this project was to make sure the plants didn't die, should have bought them on Sunday, I have a brown thumb, LOL!


Happy Mother's Day!!

Friday, May 8, 2009

Seed Accordion Gift Card


One of my favorite sites to check out on a daily basis is "No Time to Stamp?" Sharon has some wonderful projects and tutorials. When I saw her accordion cards it was a must to try them out, my first attempt was a Valentine Card that Billy really liked, even more than the brownies I made for him.


Sharon made a spring card that had pockets and I knew it was a must, I even got seeds, all though I can't use them here in Las Vegas, but will be sending them to my daughter in Reno.


This was a really fun project, the paper used was from my stash, it had to be old. The circles were made using the cutting system from Creative Memories and also the classic scallop circles from Spellbinders and my Big Shot, love these new toys.
Eyelets and raffia were used on the top to complete the card, my alphabet stamps are in Utah so I did used computer generated letters.
This would be a great card for any occasion, let your imagination run wild. Thanks for stopping by today.

Monday, May 4, 2009

A Pretty Dress...for a beautiful daughter!


With Mother's Day around the corner, it is time to send my girls a card. This is not your traditional Mother's Day card, but am sure that it will put a "smile" on their faces.


The dress pattern can be found at Patty's Stamping Spot, check it out here, she has some great projects. know that you will get inspiration from her "Stamp A Stack class card #3-Dress Card."


I used the classic scallop circle from Spellbinders, which I just purchased while on my trip to Utah. Unfortunately there is no one in the Las Vegas area that carries this product, have been looking for them for months and was lucky enough to find them at the Hobby Lobby in Layton, Utah. To make the ruffle on the bottom of the dress, I used half of a scalloped circle in a contrast color.


Added embellishments with ribbon and rhinestones, and used a corner rounder to scallop the edge of the card, learn how to use your corner rounder for scallops at SCS, finished by piercing each scallop on the dress and edge of the card.


The inside of the card features the print of the dress which was used for the sentiment on the brown dress, the pink dress I added a contrast border on the outside of the card, and used that as a mat.


Know that my girls will love this really "girly" card. Hope these cards put a smile on "your" faces.


Have a great week.


LinkWithin

Related Posts with Thumbnails