Showing posts with label Challenges. Show all posts

Wednesday, April 21, 2010

A GUARDIAN ANGEL

Have been pretty busy on my days off, not only have I been working on a quilt, but took the time to complete a couple of cards. This card is for the challenge at Our Creative Corner, they have a different sketch each Thursday.


The card base if 5 x5, with 1 1/4" squares, the paper is from the "Once Upon a Time collection." Used the corner rounder on the center mat, and used my label die cut, from Spellbinders, to make the frame around the angel. The hardest part was the embellishment, didn't want to use ribbon, put after trying twine, beads, wire, and anything else I could find, the double faced picot ribbon was what ended up on the card.


A glue pen was brought out for the wings, and then glitter added to give some dimension. Also added a pink rhinestone to the center of the bow. Used colored pencils to color the angel. Will be sending this card to my sister, she just had knee surgery on Monday, she loves angels and fairies, know this will put a smile on her face.

The other card completed will be posted tomorrow, it is using the faux silk technique, this was really a fun technique and will be doing more with this technique.

Hope everyone is having a great day, time to work on some more projects. Talk with you soon.

Tuesday, April 20, 2010

ONEIES

Ton of things to accomplish today, so just going to put this card out there. You guessed it, is it a challenge for Crafty Creations. Thought this would be super simple today, but not the case. We were challenged to use only one designer paper, one image and one embellishment. Have gotten so used to jazzing cards up with all kinds of embellishments, it was hard to use just one of everything.
The stamp is from my stash, Hero Arts, and had an inch of dust on it. Colored pencils were used for the coloring. The paper was also in my stash, a few years old. Added the bow to the handle of the basket for the one embellishment.
That's it for today, am going to work on my grandson's quilt, ran out of thread yesterday and ran to Joann's. They had some new products from Provo Craft that I couldn't resist, can't wait to put them to use. Also found that they have added Spellbinder die cuts in the stores, now I won't have to wait until going to Utah to purchase them, or getting them on line, will now have instant gratification.
Hope everyone is having a great week, talk with you soon.

Wednesday, April 14, 2010

ROSES FROM THE HEART

Got home from my trip to Reno, and everything was crazy at home. Didn't know it but Billy, my SO, had gone into the hospital on Monday night, I left that morning. He didn't tell me while I was gone, knew that I would turn right around and come home. Sunday night before leaving I had our new puppy delivered while at work, so that I could surprise Billy. When getting home I walked in and said "we're home" he knew something was up. Billy was excited about the puppy and immediately started spoiling him. Billy wasn't feeling well and went to the emergency room, and they wouldn't let him come home. His potassium level was extremely high, which can cause kidney damage.

When I returned home on Wednesday night upon calling Billy to tell him I'd be home shortly, he then told me he was in the hospital. Got home and took care of the dogs, and started my week at work and going to the hospital, trying to cope with a new puppy, which is like having a baby. Made it through my week by the skin of my teeth. Billy came home on Monday, and I was able to take sit down and relax a little.

Checked out some blogs and started a quilt yesterday, for my grandson, got the fabric while in Reno. Also wanted to check out some cards and it suddenly dawned on me that I had completed a project before leaving for Reno for the color challenge at Gingersnap Creations, which was to use the copper, ginger and rust.

Made roses that are made out of paper and then coated with UTEE, learned this technique from Hels at Ink on Your Fingers, check it out here. Hels has a wonderful tutorial for the flowers, and I can't get enough of them, they are so fun to make and there are so many different ways that you can use them. I had this picture of my mother and father on the wall, and thought that it would be great to add these dimensional roses to the frame, love the result.

The paper was from my stash, used my flower die cut from Spellbinders and add copper brads for the center of the flowers. These flowers remind me of wood flowers, that were popular back in the late 50's early 60's, am now telling my age, know that my mother would love these and want to make tons of them. It is because of her that my sister and I have such a love of crafts, she was our inspiration.


This photo shows more detail and you can see more of the colors for the challenge.

Thanks for stopping by today, hope everyone is having a great week. Am going to be working on my crazy quilt and will try to get at least one new card made before going back to work tomorrow. Found some inexpensive clear stamps in Reno, and a few other little items that I can't wait to use.

Have a crafty day.


Sunday, April 4, 2010

TAG TUESDAY #45 STUCK ON COLLAGE

Getting ready for work, it's my Friday, get off at 2am and then get on the plane at 6:40 am for my trip to Reno. All of a sudden my plate became very full. Talked with my daughter, Jamie, today and we are just going to spend quality time together and hit a couple of craft stores and possibly a quilt shop in Reno. She is a teacher and on spring break, her youngest son is out of school also, but the oldest is not on break until next week. Am really looking forward to having some "girl time."
Earlier in the week I was extremely productive and got a few things completed, this is a tag that I did for the Tag Tuesday Challenge(better late than never). The challenge was to combine collage and stickers, I have a huge assortment of stickers so it was just of matter of find the paper and stickers that would go together. My papers and stickers have been purchased through the years, and it is usually a couple of papers rather than books of paper that co-ordinate. Buy paper that hits my fancy at the time, because of this fact, I spend valuable time going through papers for collages, but that to me is half the fun.

Found some vintage type paper, and then it was time to take on the stickers, you think they are organized until you try and find what you have in mind. The vintage lady and Eifel Tower werea sticker that I found in the clearance aisle at Michaels. Used a sentiment sticker also, can't begin to know where these came from. The tag is chipboard from Michaels $1 bins, found some other shapes the other day, they are suppose to be mini scrapbooks, but that is what is so fun about crafting, we all improvise.

Finshed the tag off by using a glue pen around the edge and sprinkled with gold glitter. Did use my cutting system to add to oval behind the vintage lady, and red picot ribbon for the tie. Am literally running out the door. Thanks for stopping by, last but not least I hope everyone has a Happy Easter.

Friday, April 2, 2010

A PERECT DAY!

Tell me it isn't so, it can't be April already. Do not know where the time goes. It is so true that the older you get the faster the time goes. On my days off this week I had a couple of perfect days and what able to make some fun cards.


The inspiration for this card was gained from two different challenges. Rosie Dees Challenge is to use the colors, green, yellow, and white. These are such fun colors and just add a smile to my face.

Used my scallop fun for the circle and then cut out the center with my cutting system. The stamp was another one of those treasures that I found at Michaels, just $1, it does pay to shop once in awhile. The sketch is the challenge at Crazy 4 Challenges, it was clean and simple, but I couldn't resist adding the butterflies on the corner. Used brush markers to fill in the stamps, kept the entire card simple.

Really enjoyed making the card, it just seemed to fall into place with very little effort. Have some great news from last night, am going to be getting a new puppy next week, have to wait until we get back from Reno. Billy does know anything about the puppy so this should be fun, am having a hard time keeping the secret.

Time for me to head of to work. Thanks for stopping by today. Have a wonderful weekend.


Thursday, April 1, 2010

SIMPLER TIMES

Got really busy on my days off and completed a few cards. Need to get this one posted right away, as there are a couple of deadlines to meet. Our Creative Corner has a sketch this week, Lots to Do suggested that you use vintage, and The Shabby Tea Room wanted us to use some of our scraps, that we know we all have tons of little pieces sitting around.
I love to work with scraps of paper, and have them some what organized, I save every little piece, tell myself that there will be a time in the future that I will find a use for them. Ali gave use some ideas a while back on how to organize the scraps by color, I did this, but didn't get the prints separated by color. This is something that I really need to do, as it won't take as long to find those little treasurers.

Vintage is one of my favorite themes, so this was a piece of cake. This stamp set has come in very handy, use it for masculine cards all the time. The paper on the background looks handwritten, that is definitely vintage, we use the computer and typing for everything now days. Once the image was stamped on the polka dot background, it did emboss it with my Big Shot, and Cuttlebug folder, which has script writing. The sentiment is computer generated (Oh No!!) and a button tied with blue DMC floss to complete the picture.
Time for me to head off to work, thanks for stopping by today, and hope that you have a wonderful day.

Monday, March 29, 2010

COME FLY WITH ME!

Was really anxious to take this challenge to use only black and white on a tag. I have always loved black and white, think it is so striking. Took the time to check out all of the cards that have been submitted for the Tuesday Tag Challenge #44 and the tags are all amazing, think my tag maybe a little lame, oh, well, I really had fun trying to put this one together.


Found some great little stamps at Michaels and you can see that stamp it at the top of the tag. Used the stamp and put them together to make my own designer paper. The base if the card was a black and white print. Then a solid white with solid black on top of the print. Added my own designer paper that was stamped using colorbox ink. Grossgrain ribbon was attached to one side, paper lace design on the opposite side. Little hearts were made with a heart punch in both black and white. The sentiment was a sticker, as was the couple in black and white.


Wanted to make this into an actual luggage tag, as we are going to Reno next week. Will be spending a few days with my daughter, Jamie, grandsons, Mason and Kyle, and possibly a few quality minutes with Tim, my son-in-law, he works so hard and has extremely long days and nights.Decided to use Modpodge and put a couple of coats on the tag.

If you would like to see some of the other creative tags you can click
here. The next challenge to for myself is to do another tag and add a vintage picture of my father and add the reasons that we loved him so.

Hope everyone has a great week and take a few minutes a day to do something that your enjoy.

Sunday, March 28, 2010

WHAT A DAY!

It has been crazy around my place, started this posta few days ago, but never got back to it. Got ready for a yard sale, that was for Saturday and Sundy, but I couldn't do Sunday, was in too much pain from Saturday and slo the lack of sleep. Work nights and got up early Saturday for the sale. It worked out okay, but am in a lot of pain, also weeded the yard imbetween customers. When will I learn, that I'm not spring chicken.


I have had this tree stamp for years. It is one of favoriates, but for some reason I haven't used it in a long. time. Ran across it and thought that the sketch challenge at The Pink Elephant Challenge would work nicely. I stamped the tree with Stampin Up ink and then suing a glue pen added glitter to the leaves. Cut an oval mat and then added samller ovals. Trim on the side is ribbon. Then stamped "What A Day", had to go shopping to purchase a new stamp. Thought that it would be neat to add some siz zag stitching aound the edge, like it, but don't know if it really tied in with the rest of the card. The base of the card is 5x7, the tree stamp was to large.


This would be the card for me yesterday, got to work and "What a Day!" Hope everyone is having a wonderful weekend, mine starts tomorrow. I have half finished projects on my desk and ready want to get them completed tomorrow, but also need to deal with all the stuff I didn't sale. Oh well, just another day in the neighborhood.


Talked with my daughter yesterday and she and my sister were at a Scrapbooking Show in Salt Lae, so wished I had been there. They found some great new products, can't wait to get there to see what kind of projects we will be doing next.


Thanks for stopping by today, have a crafty one.

Tuesday, March 23, 2010

Personalized Frame

We often forget that our stamps can be used on different textures than paper. I had 5 x 7 acrylic frames in my stash and thought this would be a fun time to try and stamp on the frames. The first picture shows the flower stamp and my grandson's names, StazOn ink was used to stamp the designs.

Slid a piece of solid colored paper into the frame, to show what the stamps looked like. This shows that you can change the pictures of the kids anytime you would like. The next picture is the finished project with a picture of my grandsons, I added stars behind each of their names. Also distressed the edge of the paper, and did watercolor with my aquapainters on glossy paper and placed this so it was behind the flowers.

The picture is matted with white paper, and I used my cutting system from Creative Memories, to cut the oval picture and mat. The stars are a punch that was also purchased from Creative Memories. The metal shoes are brads and I punched a hole in the center of the yellow stars to place them. Used tacky glue to attach these stars to the frame, these are on the outside of the frame. Will be going to Reno to see the boys in April and will have to take a new picture.

This was so easy to do and want to do some for our family reunions, have the perfect picture that was taken in the 20's. There are unlimited stamps that you can use do this type of picture frame, your imagination can run wild. Oh, by the way the frames are available at Wal-Mart for $1. Scrappy Frogs challenge was stamp on something other than paper, think this qualifies.

Thanks for stopping by today, if you have time please leave a comment, love hearing from my fellow bloggers.


Monday, March 22, 2010

So glad spring is here, obviously the only thing to do is to make some great spring cards. Crazy 4 Challenge #29 has encouraged everyone to jump into spring with wonderful colors and blooming flowers. The colors are out of my comfort zone, by using purple and green together. The green card stock was plain and felt that it needed some kind of design, so the stems with tiny leaves were stamped with green Stampin' Up ink. No rhyme for reason to the placement, a no brainier.


The base of the card is purple polka dots (can't really see it, but it is there), next added plaid purple print and then the tag to the front of the card. One little strip of gold behind the tag. Warmest Wishes is a sticker, am I bad, kind of cheated on that one, but wanted this spring card to be generic.

Time to go outside and take in some sunlight, and maybe work on the yard, just a little. Yesteday I thought it was my day off and almost didn't make it to work. It is Monday isn't it?

Hope everyone has a wonderful week and can also do something crafty this week. Thanks for stopping by and for all your wonderful comments, it means alot to me that everyone takes the time to share your thoughts.

Saturday, March 20, 2010

Yummy Cupcakes

Am on a diet, so this is as close as I can get to cupcakes. Gingersnap Creations gave the members a challenge to do something with cupcakes, this is the result.


I don't have any stamps that are cupcakes, so it was a matter of trying to use a different technique other than stamping. One of my favorite things to do is check out all the $1 items at Michaels and they had these wonderful napkins, had just tried the felting technique and like the result, so it was a must buy.


Used cardstock from Lasting Impressions for the base of the card and then felted the napkin to white cardstock and used other patterned papers to give a little more texture to the card. Stamped the Happy Birthday using Stampin Up ink and my Hero Art stamp that is almost as old as I am, and that is old, LOL. The card just didn't seem complete, so I cut out the cupcakes and adhered them to the card. This can be seen a little on this picture. Didn't use dimensionals, but punched a circle from cardstock and then cut in a spiral, and attached it to the card, this is the technique for making you items "pop."


If you are interested in learning the felted technique, Splitcoast Stampers as a tutorial that is excellent, it can be found the Resource section of their blog. Hope this gives everyone a little inspiration to try felted cards.

Time for me to get ready for work. Thanks for stopping by today, if you feel like leaving a comment would love to hear from you. Have a crafty weekend.

Friday, March 5, 2010

IT'S A CELEBRATION "OOH LA LA"

Gingersnap Creations have given me the honor of being a Gingersnap Gem, this is such an honor. This group is so wonderful and they offer so many tutorials on a wide variety of techniques. That is how this particular tag came to be. Ink on Your Fingers by Hels has a wonderful tutorial on "faux flowers" and this really intrigued me. Didn't have any of the supplies but went out immediately and found UTEE and a melting pot.


Hels suggested stamping the flowers, but I didn't have a flower stamp that would work so I used my flower die cuts by Spellbinder and used patterned papers. It was really amazing how the paper kept its shape, was a little afraid that it would tear, but that wasn't the case, did learn that you do have to shape your flowers before dipping the paper in the UTEE. Once a couple of flowers were completed it was now necessary to decide how they would be used. Think they would be wonderful on gift boxes, photo boxes, or as a pin just to mention a few.


I found these chipboard tags at Michaels in their $1 bins and thought this would be the perfect opportunity to challenge myself (Scrappy Frog Challenge) by doing a collage on the tag. It's a celebration (Gingersnap Creations) and used one color and shades of that color (Crafty Creations) and these wonderful papers from Lasting Impressions was yelling to be used. The color gold is really different from the bright colors that I usually use. Added different textures 3 dimensional flower, button, pearls, chipboard sentiments, ribbon and even some gold glitter on the leaves. Crazy 4 Challenges was requesting 3 textures, think that I may have gone a little overboard on this one, but love the results.


Hope you can see some of the detail, the mix of papers and all the different textures. Will be making doing some more of these wonderful flower very soon, want to try and use leaves and different shapes not just flowers. A special thanks to Hels for this wonderful tutorial, you have opened up a new technique for me and my mind going a mile a minute to try and come up with ways to use the technique.

Time to head off to work, hope everyone has a wonderful weekend.

Friday, February 26, 2010

KAY'S DOLLS

My sister, Kay, does porcelain dolls and she just posted some new ones she just completed. Most of her dolls are very vintage, thus when I was checking out Graphics Fairy, I am drawn to the art that is vintage and little girls.


I found the art work for my card and of course it reminds me of my little sister, you can check out her blog here to see some of her wonderful creations.

The challenge at Gingersnap Creations is lace and fiber, all the dolls that Kay dresses have lace and all types of fiber, beads, ribbons, flowers, buttons and all types of embellishment. When making the card I was thinking of my sister, that is why the sentiment is Thinking of You.


The card is Kay's favorite color pink, has lace on the border, a button, and fiber under the button, which is DMC floss. The base of the card is offwhite cardstock, a mat of pink and then a print with scrolls. I matted the focal point, the little girl with black so that she would pop
.

Talked with Kay and Kaylene today, and they were out trying to find some inspiration for some new craft projects. Can't wait to see them, so we can create together once again, miss my mojo that they both give to me.


Hope everyone is have a great weekend, have a crafty day.

Tuesday, February 23, 2010

ANYONE UP FOR A GLASS OF WINE?

Cheers! Going to a dinner party and are taking a bottle of wine to the hostess, this card is the perfect companion. A few months ago I saw a tutorial for a felted card, and wanted to really give it a try.


Felted cards are made with napkins, plastic wrap, newsprint and an iron. Our Creative Corner has a challenge to try a new technique, so it was time to give this technique a try. The background is a napkin, that is ironed on to cardstock. There is a tutorial on Splitcoast Stampers with all the detail and also a video. A cocktail napkin was used, found that one napkin could make 4 cards that our 5x5, this particular napkin would be great invitations for a dinner party. I have found myself in the party section of the stores to see if there are any unusual napkins that can be used as backgrounds.


Did not want to add a lot of embellishment to the card, but did add some stitching to the yellow strip to meet the a challenge at Crafty Creations. Love the colors on this card which just happens to be a challenge at Gingersnap Creations, to use 3 colors that you love. My favorite color is red, but I also love autumn colors and with this color scheme this was possible.

The base of the card is yellow, gold is the mat and also the oval, and the final color is the brown tones. The sentiment was computer generated, the ovals were made using my cutting system from Creative Memories.

This has been a good craftying day for me, the creative juices have been flowing, more challenges met, they will be posted in the very near future. Have a great day.

P. S. If you would like to see more videos from Angie Kennedy Juda (which was featured on my post yesterday) you can click here.

Thursday, February 18, 2010

PRETTY IN PURPLE

It is my granddaughter, Katie's, birthday this month, 18 is the magic number this year. She is such a sweet girl and enjoys school, she plays the harp, is in the Debate Club, and wants to be an actress. Her favorite color is purple, so everything she gets is that color. Last year she received a paper purse and a purple shoe, for her birthday.

I had made this card in pink and wanted to make sure that this year Katie got one that is purple. The base of the dress is cardstock and then I have added strips of purple sheer ribbon to create the designer dress. I also added picot bows at the top and across the bottom. The corners were also rounded with a corner rounder and Spellbinder scalloped oval die cut for the sentiment on the front.


Ribbon happens to be the challenge at The Pink Elephant, there are some wonderful project featuring ribbon on the blog, and this is my finished project. Know that Katie will really love this card and wish I could see her face when she opens it, she is such a "drama queen."
The above picture was taken at Christmas, this was the reaction she had about all of her gifts.
Happy Birthday, Katie!

Thanks for stopping by today and have a crafty day.

Sunday, February 14, 2010

Romance is in the Air

Once the Valentine cards were completed for my daughter's class, it was time to move on to a card for my Sweetheart. I had some ideas in the back of my mine, just finished the card a few minutes ago. Billy won't get it until tomorrow, as both of us work tonight, we will have our little romantic evening tomorrow with a candlelight dinner.

Last year I gave Billy a card and homemade brownies for Valentine's day, he was more impressed with the Valentine card, hope that he likes this one as much.

It just so happens that this card will be representing a few challenges also. Gingersnap Creations wanted a card to be romantic, that brings to mind, music, roses, hearts and of course hugs and kisses. The background paper was from Graphics Fairy, the roses were embossed, or should I say de-embossed using my Big Shot and the Textured Impressions Manhatton Flower. A brayer was used to color the flowers with Classic Red Ink from Stampin Up.

The love sentiment is from a wedding set, that was purchased at Joann's on clearance, got to love that. The ovals are from the scalloped oval die cuts from Spellbinders. The heart punch from Creative Memories was used to make the three matted hearts. Heart studs were added to the center of each of those hearts. This made for a "Mushy Gushy Valentine" which is the challenge for Pink Elephant, and "Have A Heart or Hearts" is the challenge at Daring Cardmakers.

Time for me to head off to work, hope everyone has a wonderful Valentine's Day and you get hugs and kisses from your loved ones.

Thursday, February 11, 2010

LOVE LETTERS

These little mailboxes have been around for years, but I have never decorated one. It was a little harder than I thought it would be. Found this mailbox at Michaels, it was a Christmas mailbox, but changed it to hold love letters for Valentine's Day, this was a challenge at Scrappy Frog.

Used X's and O's paper from my stash, added ribbon around the middle. It was necessary to take off the arm, used brads to put it back on. The background for the letters was embossed using a Big Shot. The folder is from Provo Craft. Also used ribbon around the edge of the lid, also covered the front with a different heart paper.

The sentiment on the arm was stamped with red ink, and then colored in with colored pencils, the scalloped circles were made with Spellbinder die cuts. The flower on the corner of the sentiment is sheer ribbon, that are loops that are glued together and then added a heart stud in the center.


Maybe if I leave this out in the family room, Billy, will leave me a love note, for Valentine's Day, that would be a wonderful surprise.

Thanks for stopping by today, have a crafty one.

Thursday, February 4, 2010

WATERCOLOR ROSES

Embossing is one of my favorite things to do when stamping. Last year when I stared to stamp again and blogging, I wondered onto Patty's Stamping, she had some wonderful cards where she had done watercoloring and embossing. At the time I had none of the necessary supplies to try this technique, but knew that it was something that I wanted to try. In the coming months I purchased the Fifth Avenue Floral Set, Reinkers and Aquapainters all from Stampin Up, sounds like a commercial.


With everything going on once I had the supplies I just never got around to trying the technique, until now, almost a year later. The challenge at Gingersnap Creations is to using embossing, the rose is embossing with pearl white embossing powder. Patty suggested shimmer paper, but I used a heavy cardstock, which worked well. Patty has a wonderful tutorial on this technique and you can see it by going to her blog and clicking on April 2008, Watercolor Roses--Technique and Video Tutorial. This was my first attempt at watercoloring with ink, I am not an artist so this was definetly something that I would not have done with out all of Patty's excellent information, it is so easy and fun to do.


The basic card is paper from Lasting Impressions, the ink colors were red, orange and yellow. Happy Birthday stamp is from Hero Arts. Added a little satin ribbon and bow to finish off the card. Love how it turned, the card will be given to one of my co-workers along with some homemade brownies to celebrate her birthday.

When trying the technique I stamped a couple of other roses, and tried different colors. The rose was used as the focal point for the sketch from Mojo Monday, Week #124.

The background paper is from Creative Memories, and Lasting Impressions. The embossing powder is pearl white, and basic yellow and orange were used to get the watercolor effect. Instead of paper on the bottom paper where the rose is, ribbon was used.


Have a few other stamps in my stash that I want to try this technique with in the future.

It's my Monday, so it is time to get ready for work. Have a crafty day, and thanks for stopping by.

Friday, January 29, 2010

TIME AND FUN

Time flies when you're having fun! Truer words have never been spoken, the older we get the faster time flies. It does not seem possible that Monday we will be into February 2010. Where does the time go? Time happens be the Chestnut Theme Challenge and Gingersnap Creations, thus this is my interpretation of "Time."
While lying in bed, it dawned one me that "Time flies when you're having fun!" Now that I had that theme how to put that on a card. I realized I had a clock in one stamp set and wings in a fairy set so the only thing to do was put them together.

The background paper used for the background may look familiar to those of you that have papers that you purchased years ago. The edges of the card were distressed, the clocks were colored in with chalk. Found a charm to also add to the front.

The sentiment for the front and inside were computer generated. I also matted the inside of the card to finish the card off. It amazes me how we all look at these challenges in a different way, we are all so unique and it is so much fun to see what comes out of these challenges. Thanks to the DT for all of their inspiration.

Thanks for stopping by today, please leave a comment, and have a crafty day.

Wednesday, January 27, 2010

MORE AND MORE CIRCLES

Just love to do circle cards, even though, they are few and far between. This one was just crying to be done. I had made a similar card last year that was for a gift card, but this one it a folded card, that looks like a flower. Mojo Monday is where the inspiration came from, and then I looked to The Pink Elephant, and Crazy 4 Challenges to put everything together.


The Pink Elephant challenge was Polka Dots, Bow, and Pink. Crazy 4 Challenges was Pretty in Pink.
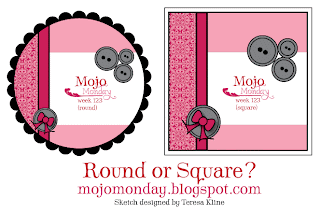
The sketch at Mojo Monday could be done either as a circle or square.


For the center circle my scalloped circles from Spellbinder was used, then using a 1" circle punch the other two layers were added. Brown polka dot grosgrain ribbon for texture and hearts that were found at Michaels. The stamped sentiment was from a discontinued wedding set that I found at Joann's over 6 months ago, never know when you will be able to use some of those stamps, but just need to look at them from different points of view.

The first card I did was red, and then it dawned on me that the challenge was to use pink, oh well, it just made the pink one easier to complete. The paper was from Lasting Impressions, my sister found it at a huge discount. Love all those bargains!!

Have a list of cards and projects that I want to finish in the next couple of days, so am off to complete some Valentines. Please leave a comment, it is great to hear from all my blogging friends.

Have a crafty day.

LinkWithin

Related Posts with Thumbnails