
Gingersnap Creations has so many wonderful challenges, and I wish there was time to do all of them, but am not staying focused very well lately, have a ton of projects started and keep finding more to start, thus there are alot to complete. Made a list yesterday and hopefully this will help.
GC#70 challenge is to use punches, this is my finished card. The hydrangeas where made by using a piece of white cardstock 1" wide, then folded in half, you then punch out a heart to make the flowers. I then used a sponge and yellow ink to do the center of the flower, and pink ink to sponge the outside of the flower. It takes 2 hearts for each flower, the leaves are also a heart punch, a halft pearl was added to the center to complete the flower. The base of the card is pink card stock, then an embossing folder was used for the white mat. The oval and rectangle are from Spellbinders. The watercan is a stamp from a set that I purchased at Michaels.
This was such a simple technique that I was able to teach my niece how to do it, and also owed my Aunt. My Aunt is just getting into papercrafting and this was something that she would see the result immediately. She does wonderful dried flowers and gave me some that I will be using on my cards.
Am trying to get a few things together for a Boutique with my Aunt around the first of November, really have my work cut out, but am looking forward to giving it a try, will be able to spend some quality time with her, so it will be worth the time.
Thanks for stopping by, would love to hear your comments. Have a wonderful day.


 Slid a piece of solid colored paper into the frame, to show what the stamps looked like. This shows that you can change the pictures of the kids anytime you would like. The next picture is the finished project with a picture of my grandsons, I added stars behind each of their names. Also distressed the edge of the paper, and did watercolor with my
  The picture is matted with white paper, and I used my cutting system from Creative Memories, to cut the oval picture and mat. The stars are a punch that was also purchased from Creative Memories. The metal shoes are brads and I punched a hole in the center of the yellow stars to place them. Used tacky glue to attach these stars to the frame, these are on the outside of the frame. Will be going to Reno to see the boys in April and will have to take a new picture.
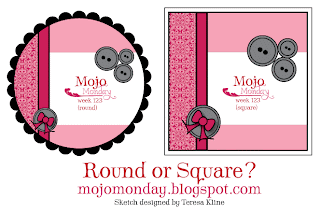 For the center circle my scalloped circles from
 One of the reasons I love fall so much is that it is the beginning of the holiday season, I know that I will be seeing my family soon. Our plan for Christmas is to be in Utah at from daughter Kaylene's. Jamie, who lives in Reno maybe coming to Las Vegas for Thanksgiving. Last year when Jamie was here we made bookmarks for her students, we will definetly be doing something special once again this year.


 The picture below the center of each square is pierced and then added a dot in the center so that it would show more.
 I was talking with my daughter Jamie, who is a teacher. she told me about some of the projects she does and that they have a lot of scrap paper. This would be the perfect project for the scraps and am sure that her students would come up with some very creative and unique flowers. The project is easy and fun, once you make one you want to make more.